How to Attachments
Last updated About 2 months ago
Attachments allows you to attach Objects to each other.

Select the object you want to attach something to, then open the Inspector Panel.
Navigate to the Attachments section and select Add Attachment.
Choose a different Object you want to attach using the Attached Entity drop down menu or by using the 🎯 target icon.
Use the Gizmo or Inspector Panel to adjust the position, rotation and scale as necessary.

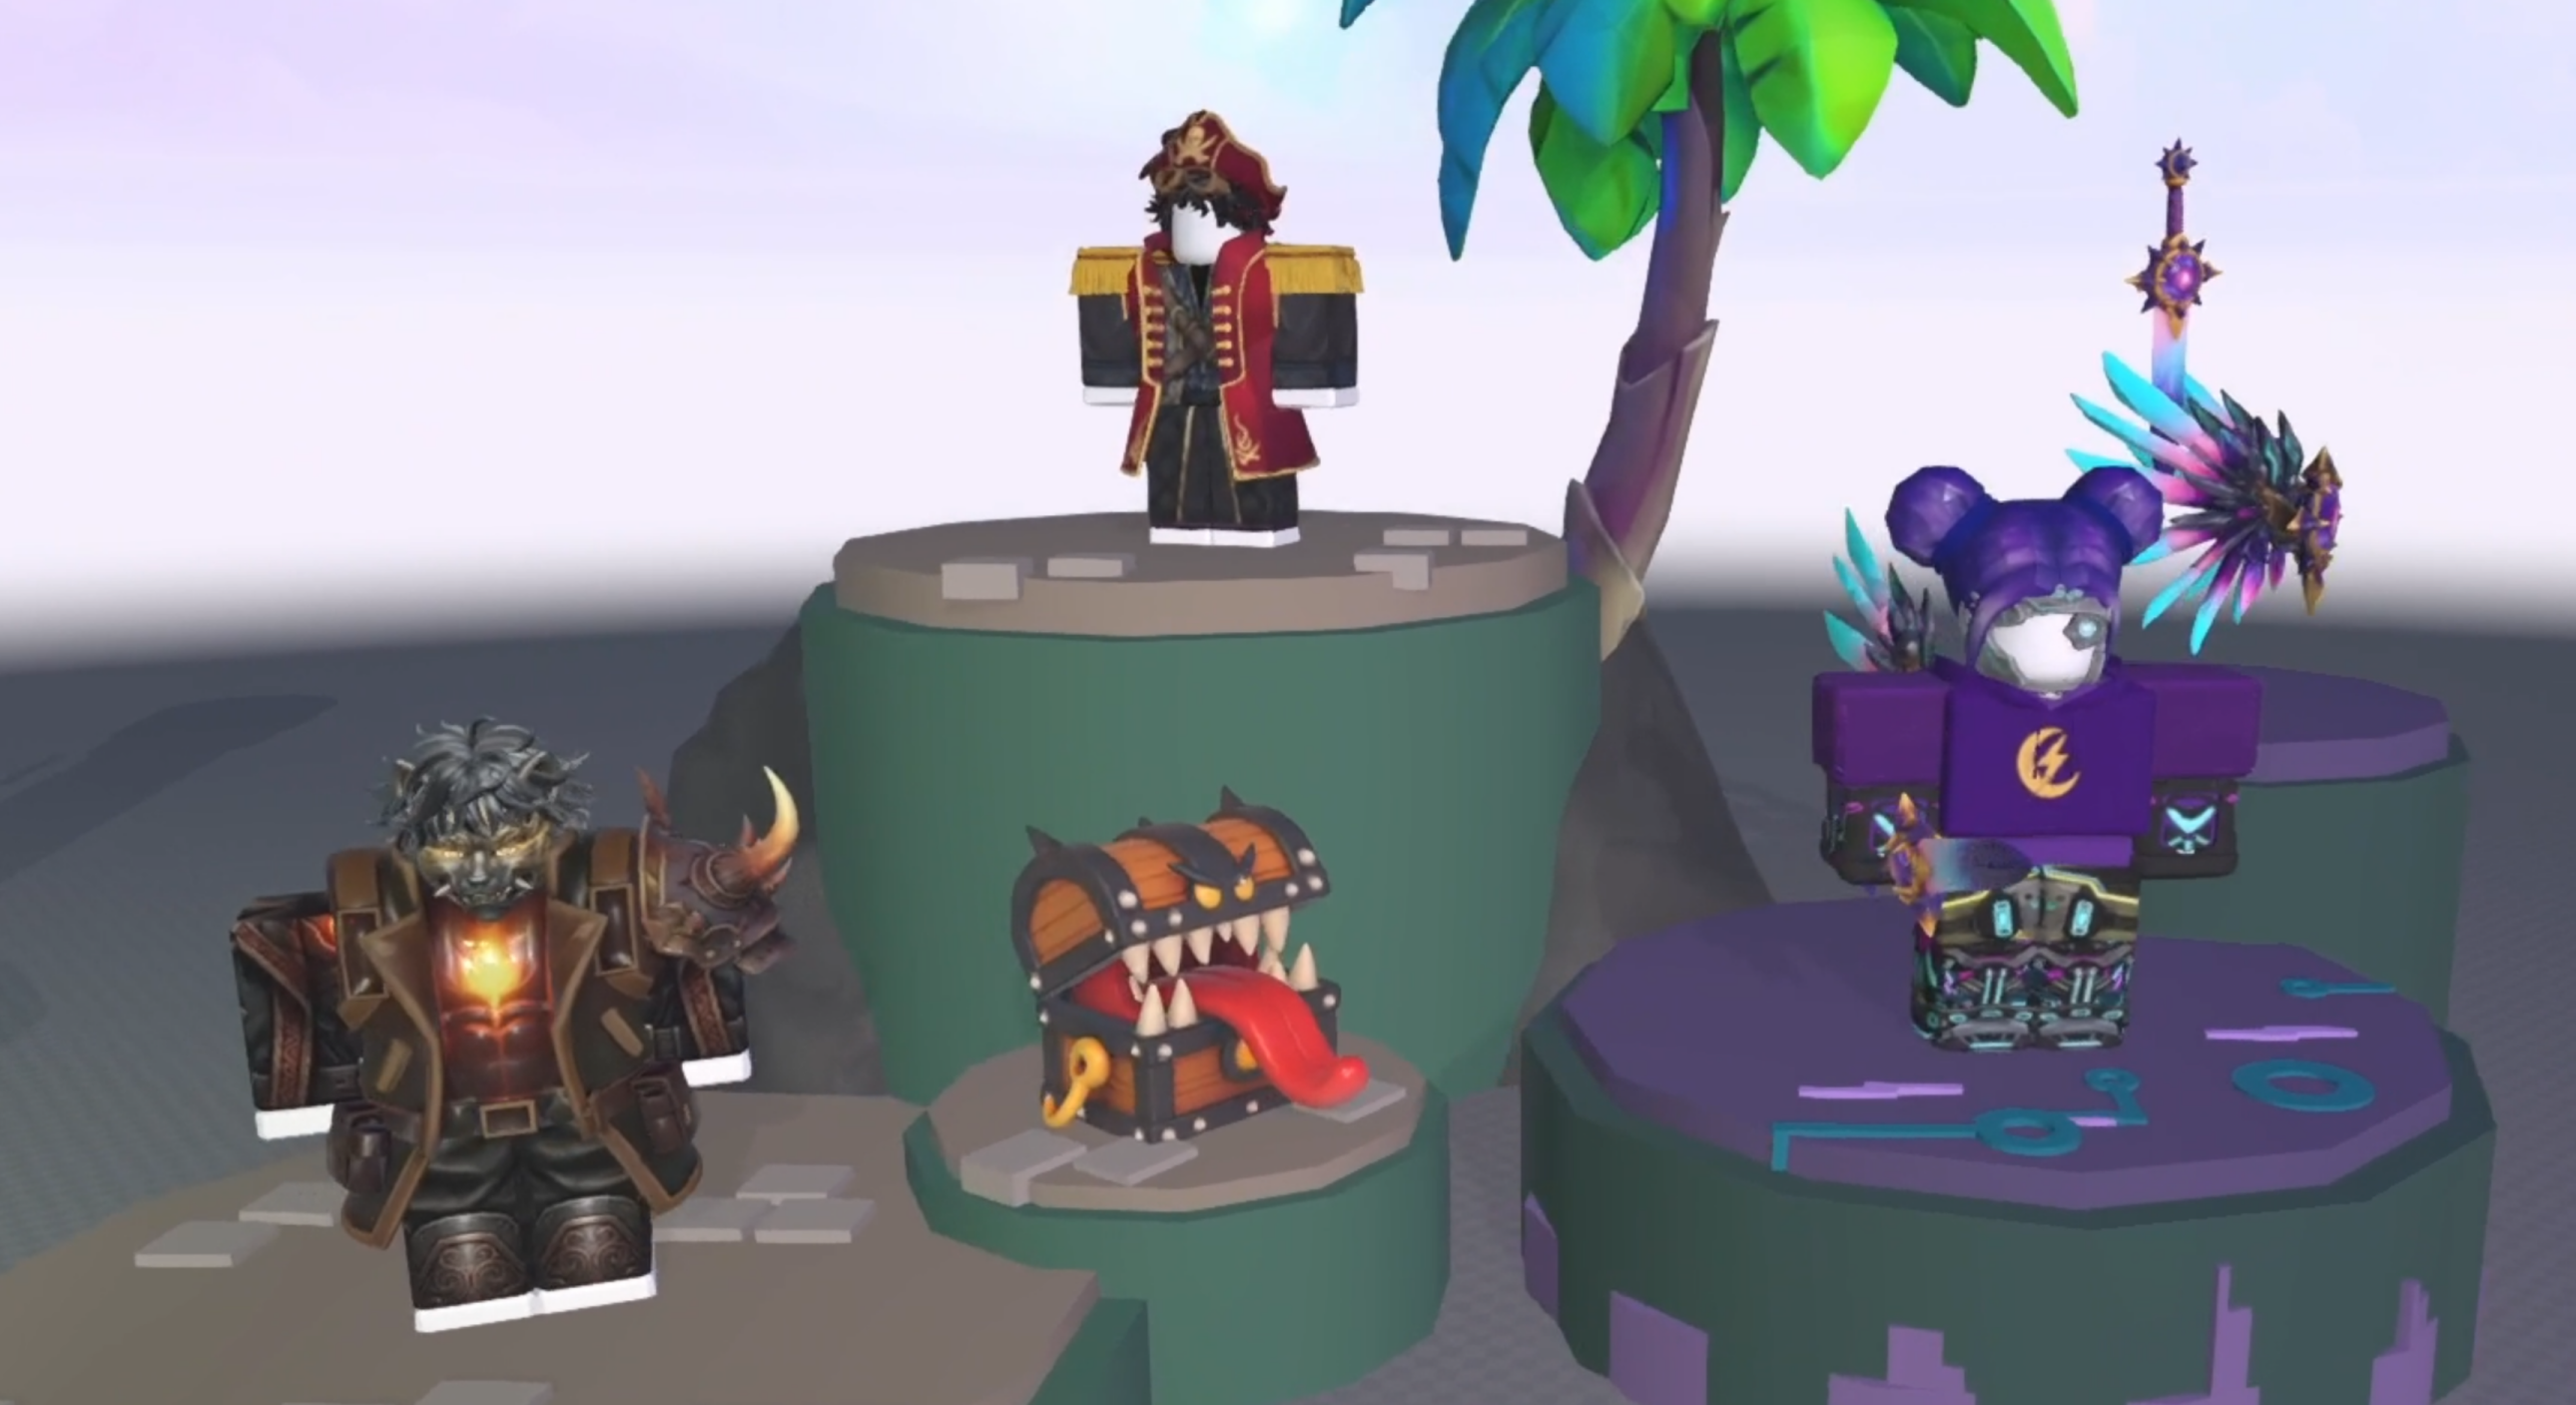
Attachments also work on rigged and R15 Roblox characters. When using rigged characters, a skeleton appears in the Inspector Panel.
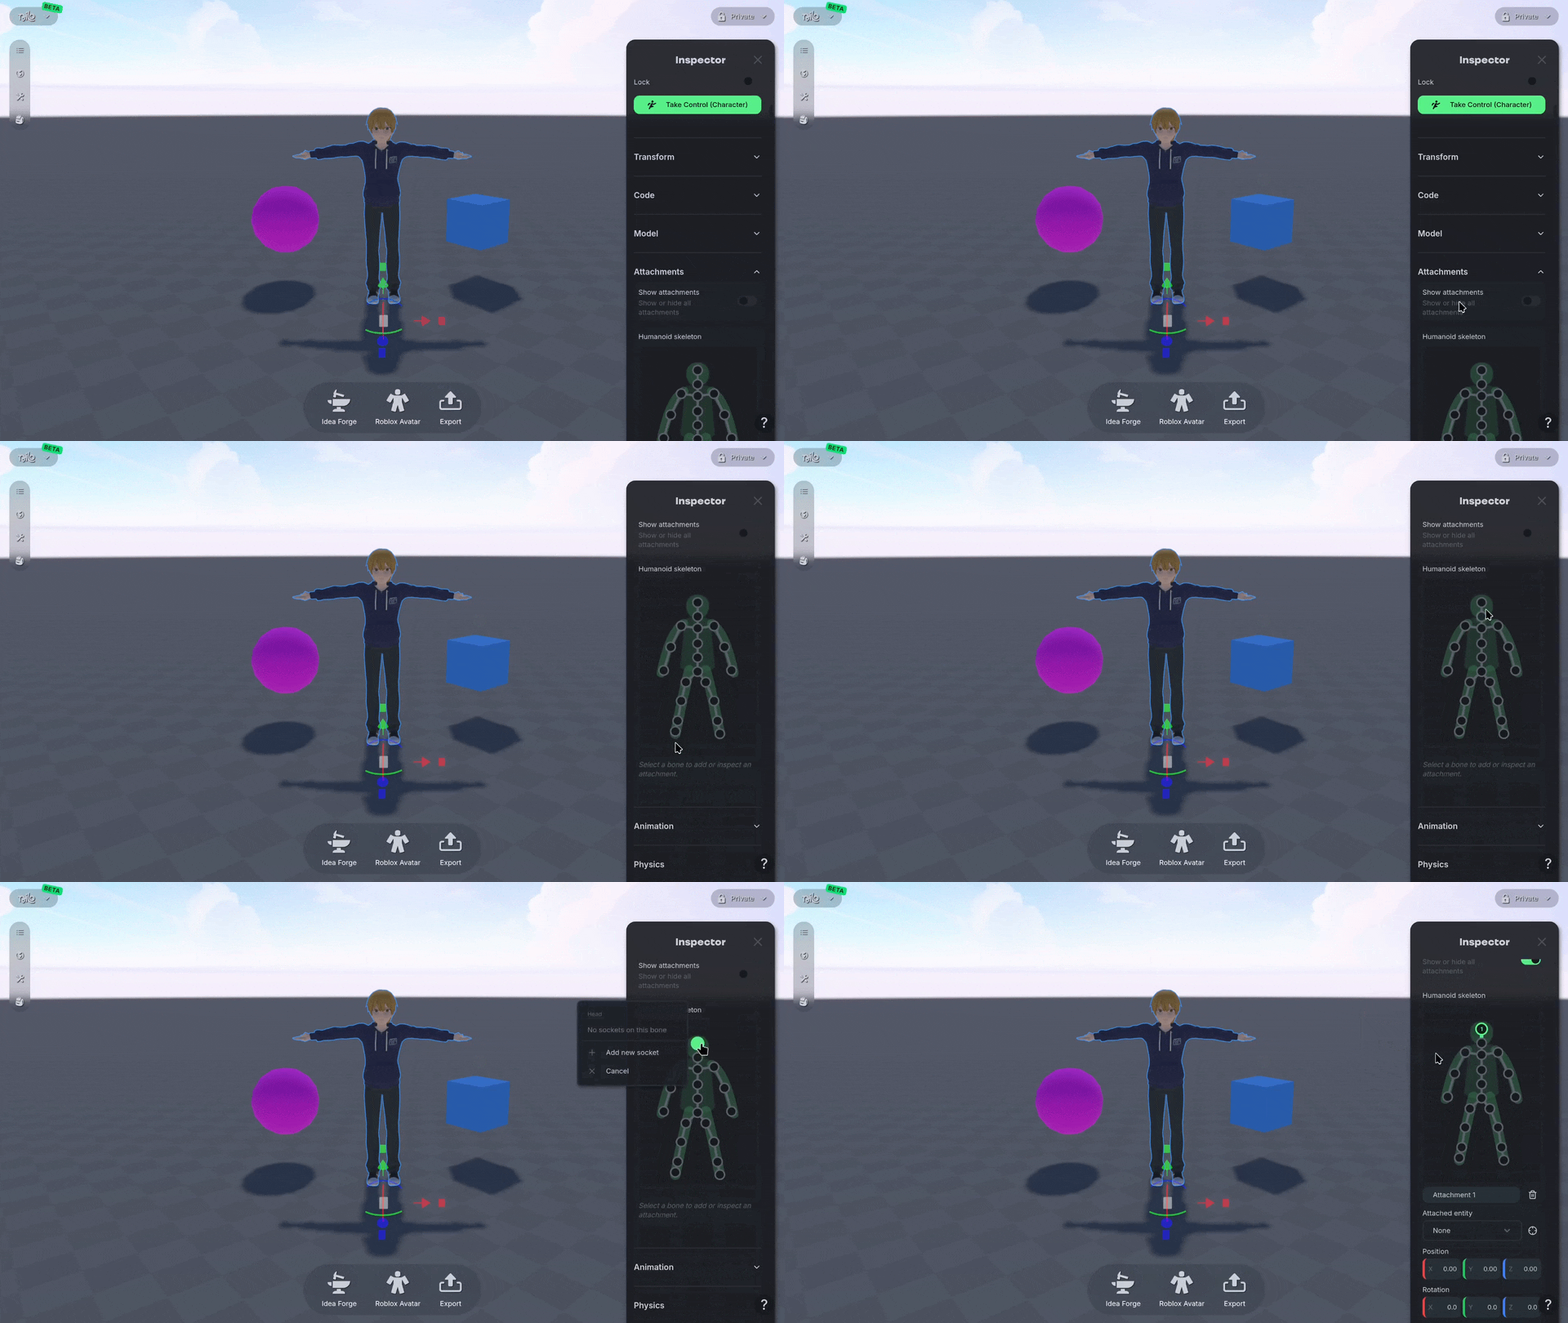
Select a gray dot to Add New Socket to the character.

Then choose a different Object you want to attach using the Attached Entity drop down menu or by using the 🎯 target icon.

To remove attached Objects, change the selection to None in the drop down menu.
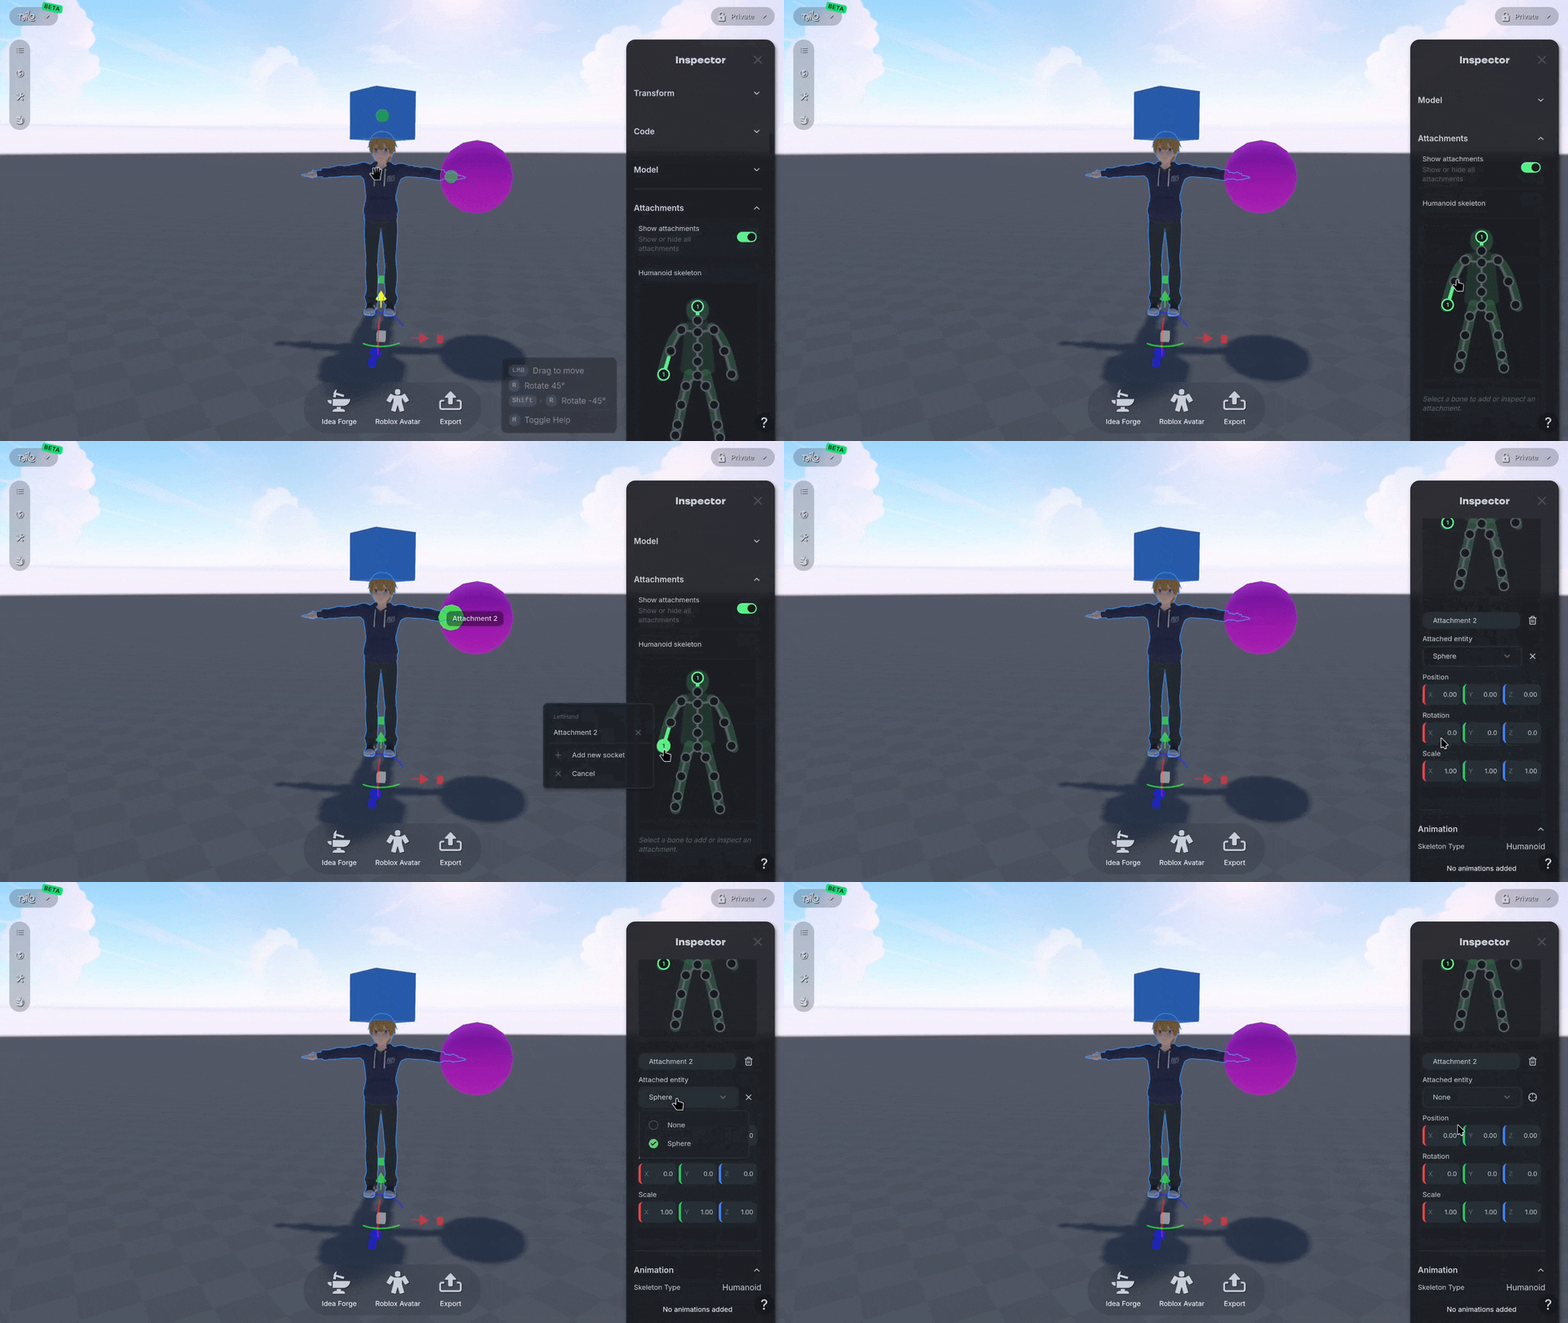
You can also delete the attachment socket to remove attached Objects.

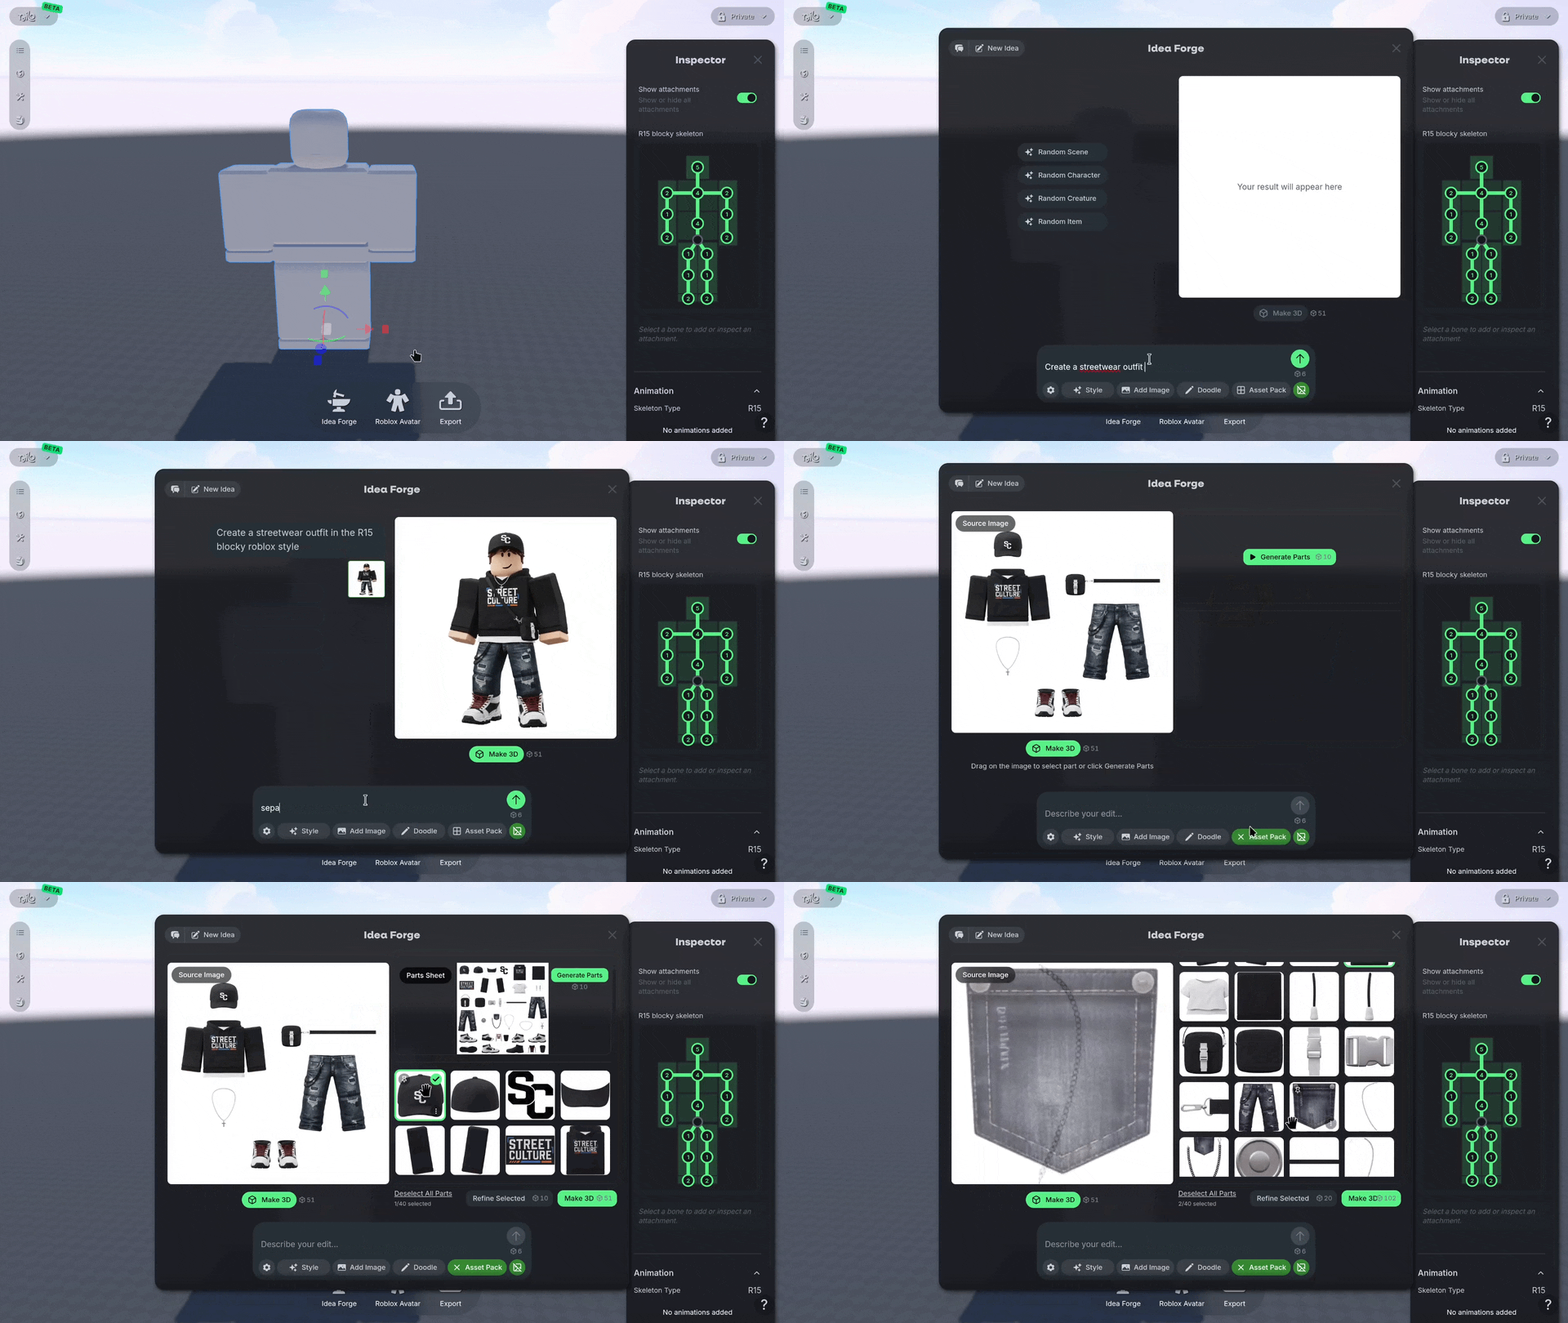
For stylized clothing like Roblox R15 avatars, prompt a concept for a set of items that includes create a set of outfit parts in the Roblox R15 style for [what you want here] to generate 3D models that fit the base avatar shape.
Using the Attachments section, add the parts you create to the avatar.

Use the Gizmo or Inspector Panel to adjust the position, rotation and scale as necessary.
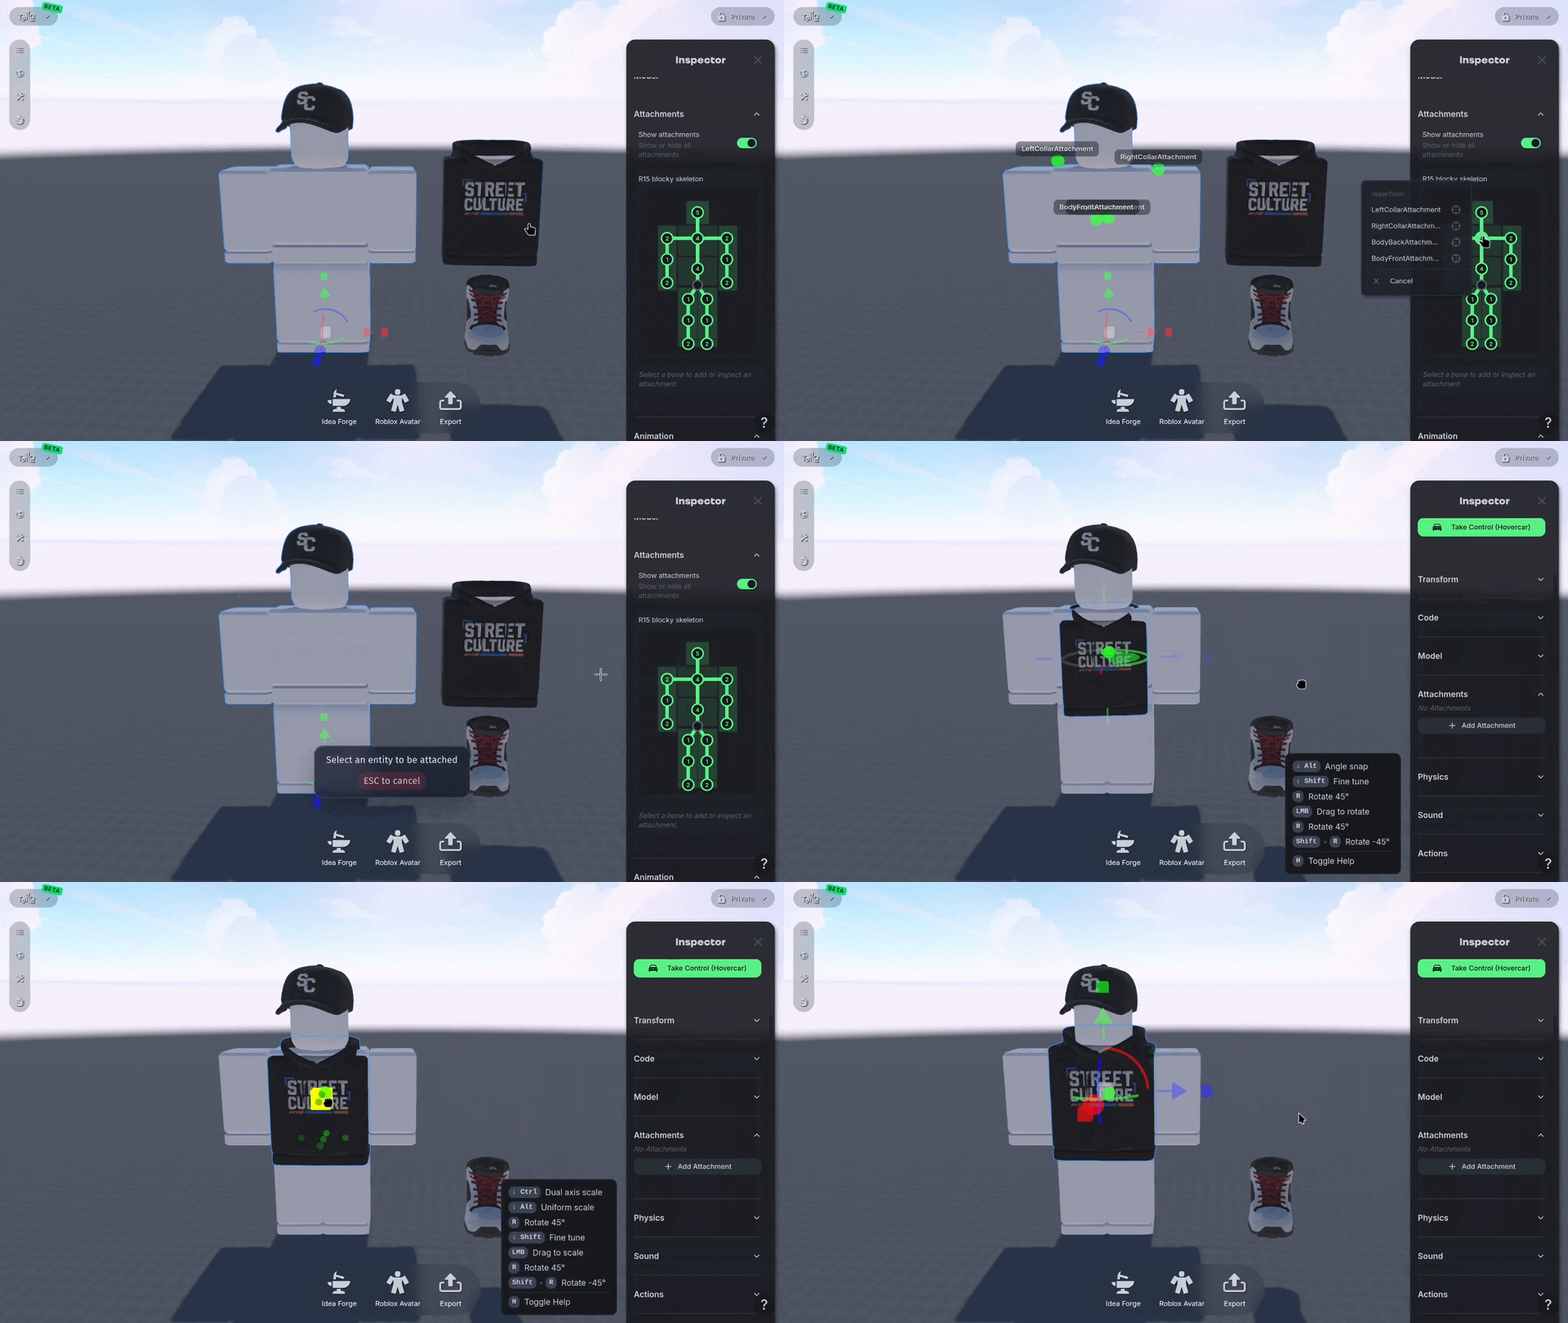
Attachment points are visually represented as green dots when hovering over a model. You can also drag and drop Objects onto the attachment points.

When exporting the RBXMX file to Roblox, the attached objects will also get exported.
Was this helpful?
Still need help? Ask the team