How to Workbench
Last updated About 1 month ago
Workbench makes creating Roblox-specific Characters easier in Nilo.
Right Click an empty space in the world, then select Create Object, then Roblox Character.
Select ✨ Random Idea or type your own prompt to generate a 👕 Torso and 👖 Leg texture.
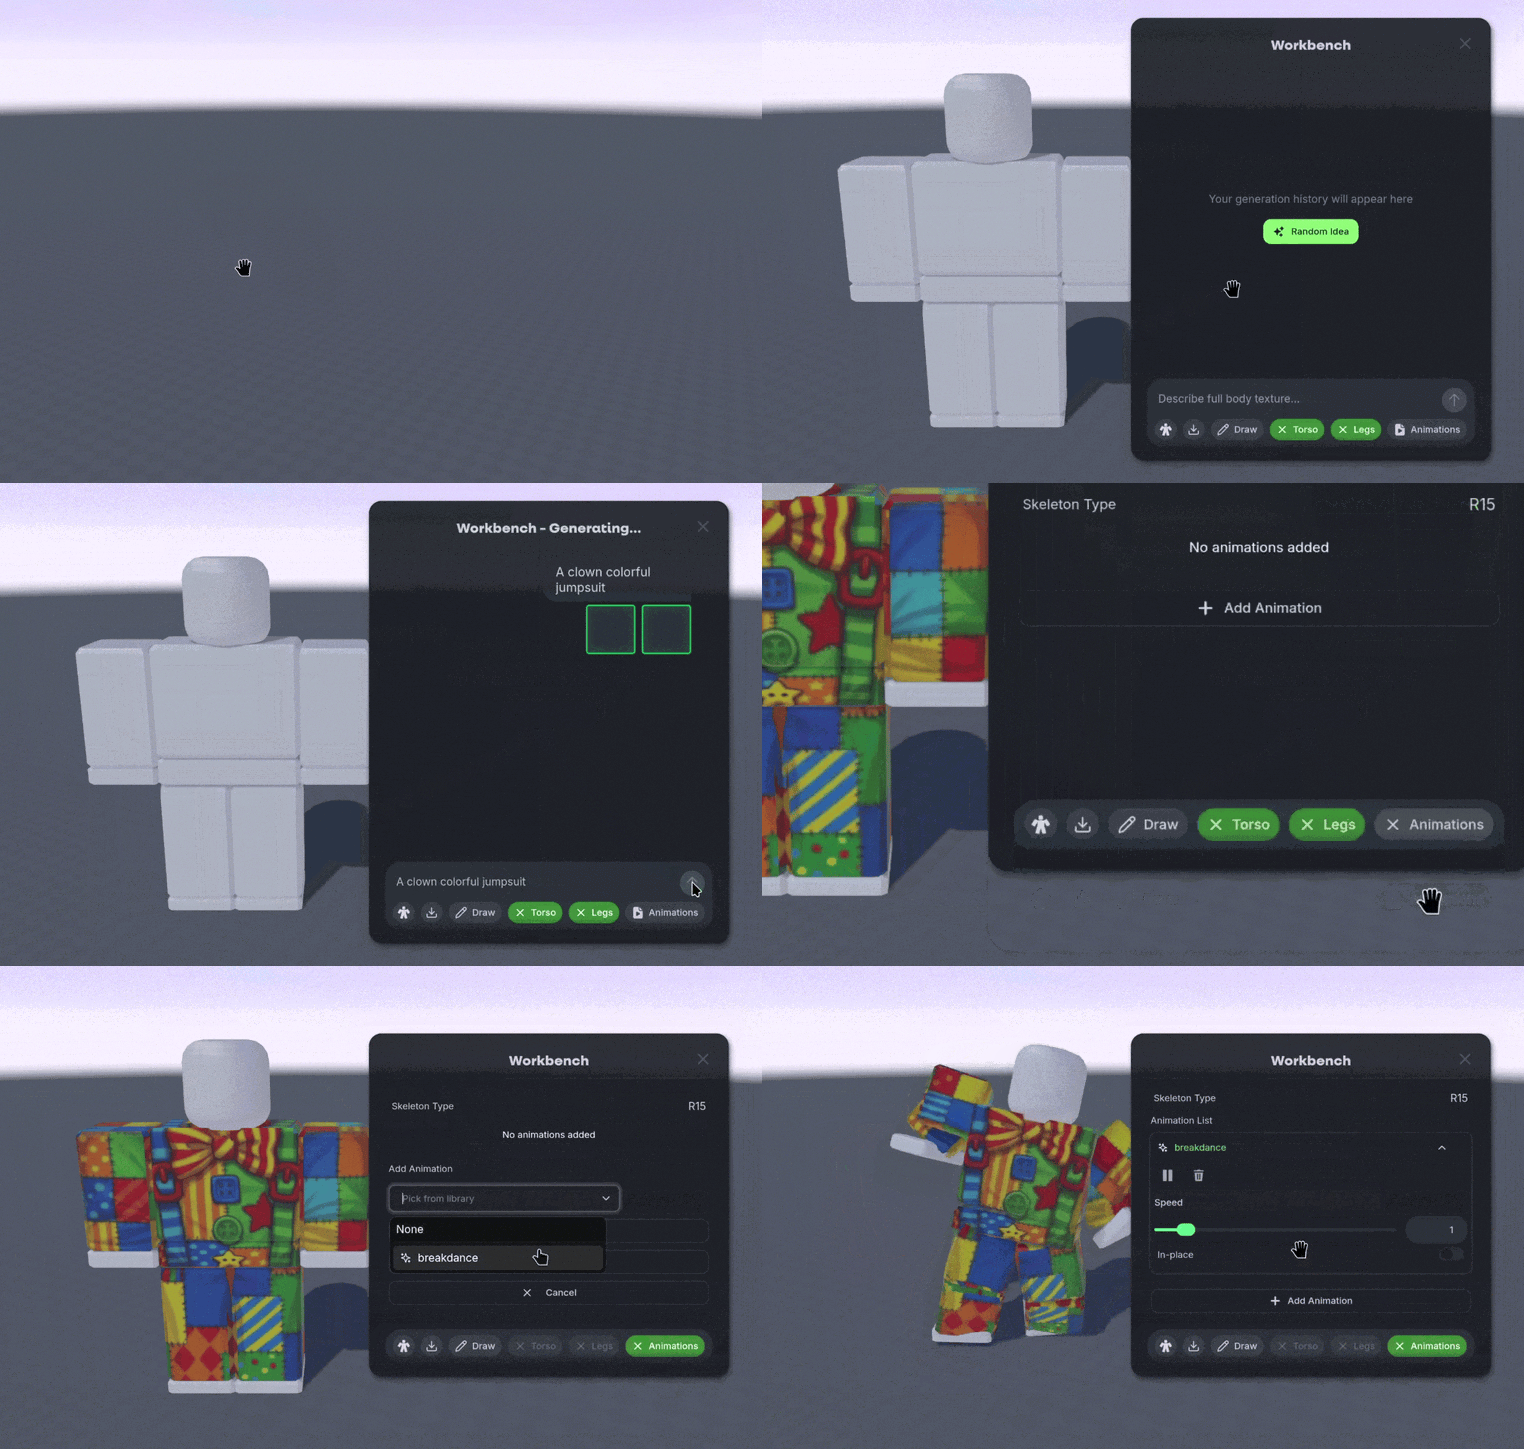
Select the🧍🏻Roblox Character icon to adjust the skin color of the character.
Currently, Workbench only supports R15 characters and not R6 or other types.
Connect to Roblox Account
Connect to Roblox Account
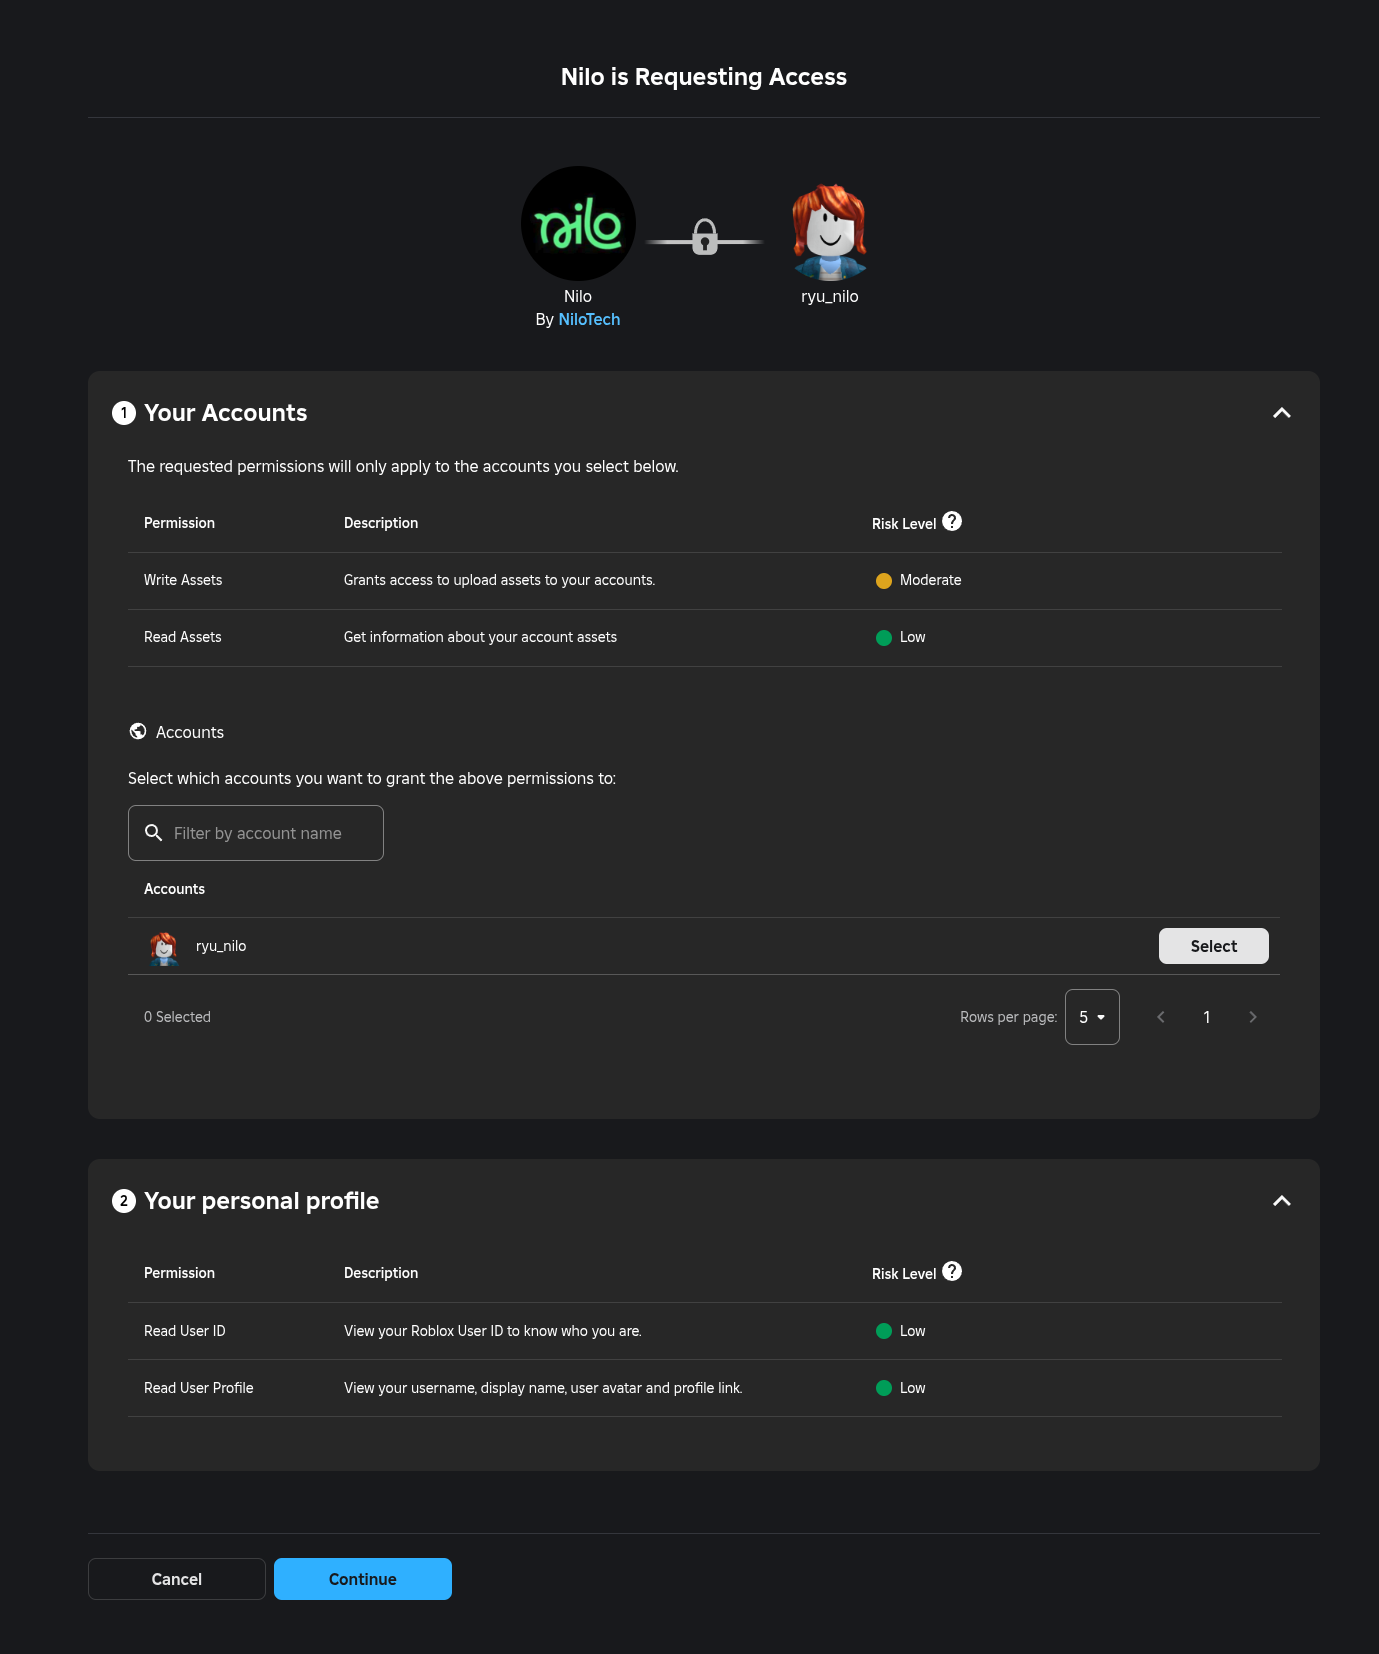
Go to your account page or open Workbench and select the Connect button in the top left to connect your Roblox account.
Login to Roblox, and select the account you want Nilo to connect to.
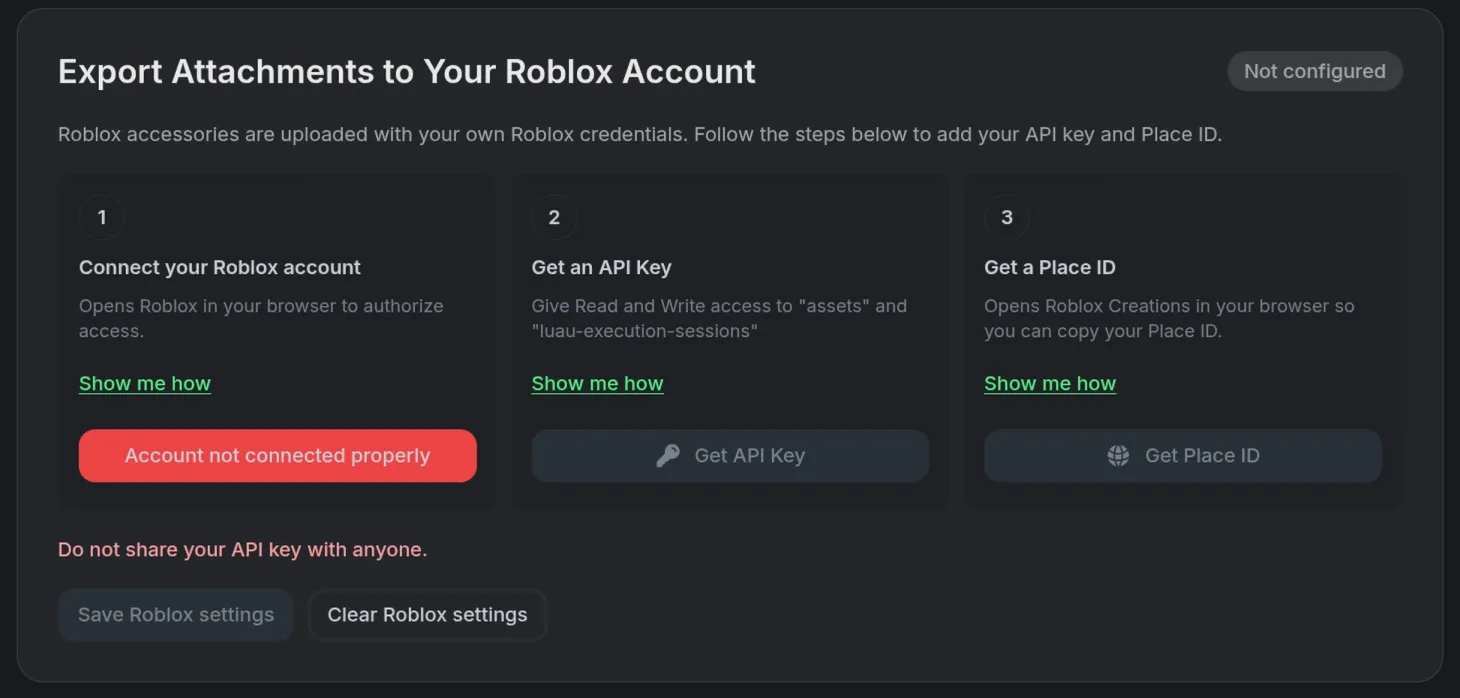
Under the account page, find the Roblox export setup and add your Roblox API Key and Place ID.
Workbench Export to Roblox
Workbench Export to Roblox
Select the 🔽 Download button to export your character as a .RBXMX Roblox file with animations and textures included.
Then import the .RBXMX file to Roblox Studio directly.
Exporting as .RBXMX requires a Builder or Pro subscription. You can still download Torso and Leg textures manually without a subscription.
Workbench Draw Mode
Workbench Draw Mode
Select ✏️ Draw to paint your own details directly on your Torso or Leg textures.
You can refine specific areas of your texture by drawing on the area you want to change, and referring to that selection in the prompt.
Workbench Animate Mode
Workbench Animate Mode
Select Animations, then Create Animation.
Type a prompt to describe your idea, then refine the details.
Adjust the Speed or use Pause to control playback.
Generate multiple animations and select Pick from Library to choose from animations you have created for your avatar.
Toggle In Place to keep the character from moving it’s position in a Nilo World when animating.
Was this helpful?
Still need help? Ask the team